


Instead of swapping guards at random and chasing dark lines higher, learn how to use hair clippers for a fade with a fixed sequence: check your equipment, remove bulk, establish a low guideline and blend upwards. This 2026 workflow starts with a guarded fade, leaving skin-close cutting for later.
- MV Hair & Beauty supplies Australian barbers and hairdressers; start with compatible guards, not extra finishing tools.
- Learning how to use hair clippers for a fade starts with a guarded baseline and controlled lever adjustments.
- Work from longer guards to shorter sections, then blend each boundary without raising the fade.
- Stop immediately if blades pull, scratch or become uncomfortably hot.
Why this matters
A fade is a gradual change in hair length, not simply short sides. Removing the wrong patch creates a hole; repeatedly cutting above a stubborn line pushes the whole fade higher.
A low guarded fade is the better first exercise because it lets you practise transitions without cutting down to skin. Its limitation is the finish: it will not produce the bare lower section of a skin fade.
Before cutting, check the hair clipper guards guide. Guard numbers are useful shorthand, but the length marked on your compatible attachment is the setting to follow.
MV Hair & Beauty is best for Australian barbers and hairdressers sourcing barber and salon supplies. For your first fade in 2026, prioritise understanding the clipper you own over adding more tools.
Before you start
- Equipment: Have your clipper manual, approved charger, compatible guards, clipper oil, cleaning brush, suitable blade disinfectant, comb, sectioning clips and cape ready. Use clear lighting and mirrors that show the back of the head.
- Hair and access: Start with clean, dry, detangled hair and a consenting person who can remain still. For self-cutting, confirm you can see the nape before switching on; stop if you cannot control the tool there.
- The easily missed gotcha: Guards are not universally interchangeable, and lever travel differs between clippers. Check attachment fit, blade condition and the manual's lever instructions before making a guideline you cannot blend out.
Do not cut over broken, inflamed or visibly infected skin. If you are practising on a mannequin, follow its hair-care instructions rather than assuming every training head tolerates the same tools or treatment.
Clipper setup and length map
Unbox and inspect
- Unplug the clipper before inspecting the cutting head. Remove packaging and any blade cover, then check for damaged teeth, loose parts or a distorted guard.
- Read the manufacturer's charging, lubrication and cleaning instructions. Use the specified power supply; do not assume a connector that fits is electrically suitable.
- Prepare and oil the blades as directed. Wipe away excess oil so it does not transfer onto hair or skin.
- With the clipper switched off, fit your longest working guard. Confirm it locks securely and cannot rock loose under gentle pressure.
- Switch on away from the head and listen for unusual rattling. Stop if anything appears loose or the blade assembly behaves abnormally.
Expected result: The clipper runs normally, the attachment stays secure and you know how to switch it off without changing your grip.
Understand guards and the taper lever
On a conventional adjustable clipper, closing the taper lever gives the shorter setting; opening it leaves more length. Check your manual rather than assuming which physical direction means open.
Common guard markings are approximately #1 at 3 mm, #2 at 6 mm and #3 at 10 mm. These are nominal guide lengths, not a promise that every pass leaves exactly that measurement: hair direction, technique and lever position affect the result.
For this exercise, use your compatible equivalents of those lengths. Keep any intermediate guard supplied for your model nearby, but do not substitute an attachment that fits loosely.
Do not zero-gap a new clipper for this exercise. Moving cutting teeth too close to the stationary blade increases the risk of scratching, and a guarded beginner fade does not require that adjustment.
Choose your starting workflow
| Workflow | Best for | Advantage | Limitation |
|---|---|---|---|
| Low guarded fade | Beginners practising transitions | Keeps the shortest section guarded | Does not leave a skin-close finish |
| Skin fade | Trained users with controlled clipper and finishing technique | Creates a bare lower section | Adds another difficult transition and greater skin-contact demands |
Choose the low guarded fade for your first attempt. A more dramatic finish is not a substitute for an even blend.
Hair preparation and fade boundaries
- Comb the hair into its natural fall. Identify changes in growth direction around the crown, behind the ears and at the nape.
- Separate the longer top from the sides with sectioning clips. Keep loose top hair out of the clipper's path.
- Agree on the highest point the fade will reach. Use the temple and the curve above the ear as visual references, and compare both sides before cutting.
- Fit the longer working guard, such as the attachment marked approximately 10 mm. Remove excess bulk below your chosen upper boundary, moving against local growth with controlled strokes.
- Curve the clipper away from the head as each stroke reaches the boundary. Do not drive it straight into the longer top.
Expected result: The sides have a manageable starting length, the top remains separate and the upper fade boundary has not moved.
The outward movement is a small scooping action, not a sudden wrist flick. Start with the guard resting gently against the hair, travel upwards, then lift away so the teeth stop cutting before reaching the longer section.
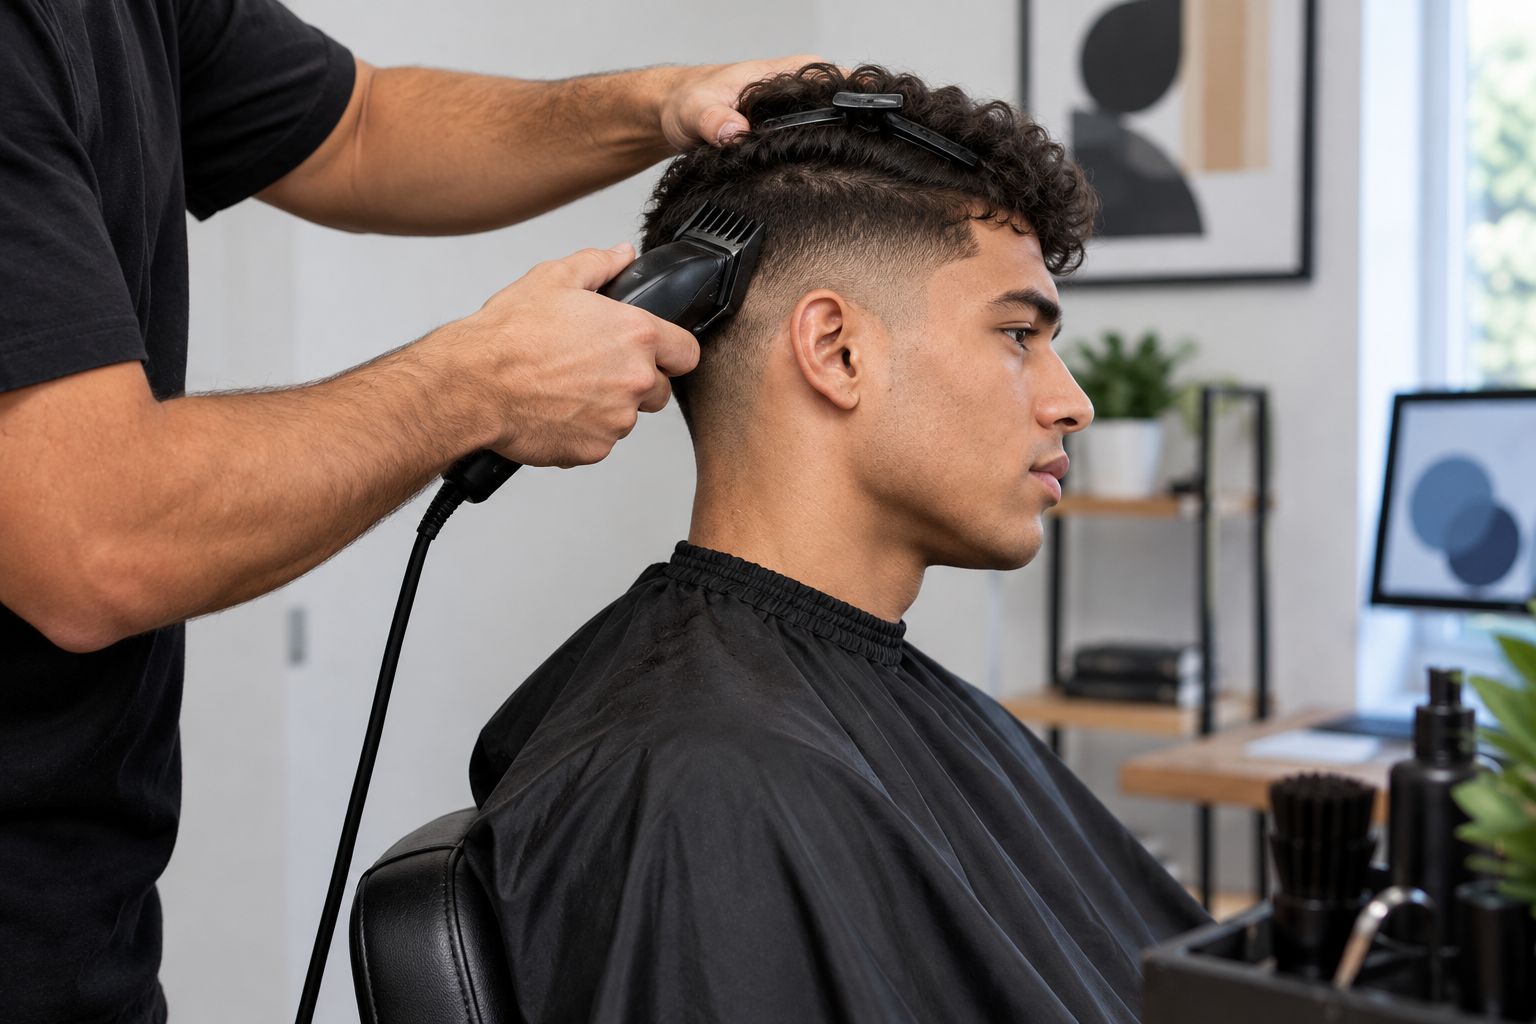
Keep the head upright while checking balance. Tilting it changes your view of the guideline and makes matching the opposite side harder.
Guideline and blend configuration
Establish the shortest section
- Switch off and fit the shortest guard for this exercise, such as the attachment marked approximately 3 mm. Start with the lever open to preserve more length.
- Cut only the lower section, keeping its upper boundary low and consistent around the head. Leave visible space above it for the transition.
- Use light, overlapping strokes against the local growth direction. Around the ear, reposition the head and fold the ear gently clear rather than pressing harder.
- If the lower section needs shortening, close the lever gradually and work below its upper edge. Keep the shortest passes lowest.
Expected result: You can see a short lower section with an even upper boundary, while the hair above remains longer.
Do not create the first line with a bare trimmer. A trimmer can cut closer than your clipper's shortest setting, leaving a line that this guarded sequence cannot remove.
Blend the middle transition
- Switch off and attach the middle guard, such as the attachment marked approximately 6 mm. Begin with the lever open and work in the section above the shortest area.
- Scoop out before reaching the longer upper sides. Comb between passes so you assess standing hair rather than flattened hair.
- Close the lever gradually to refine the lower edge of this middle section. Keep each shorter adjustment below the previous, longer pass.
- Return to the shortest guard with the lever open and lightly address the boundary immediately above the shortest section. If a gap remains between settings, use a manufacturer-compatible intermediate guard where your system provides one.
- Recheck the upper transition using the longer guard. Remove only visible excess; leave the top disconnected rather than attempting unfamiliar clipper-over-comb work.
Expected result: The change from short to long becomes less abrupt without the fade climbing higher.
The sequence is Bulk removal, Low guideline, Middle blend, Final check. Treat it as your 2026 practice checklist: finish and inspect each stage before changing settings.
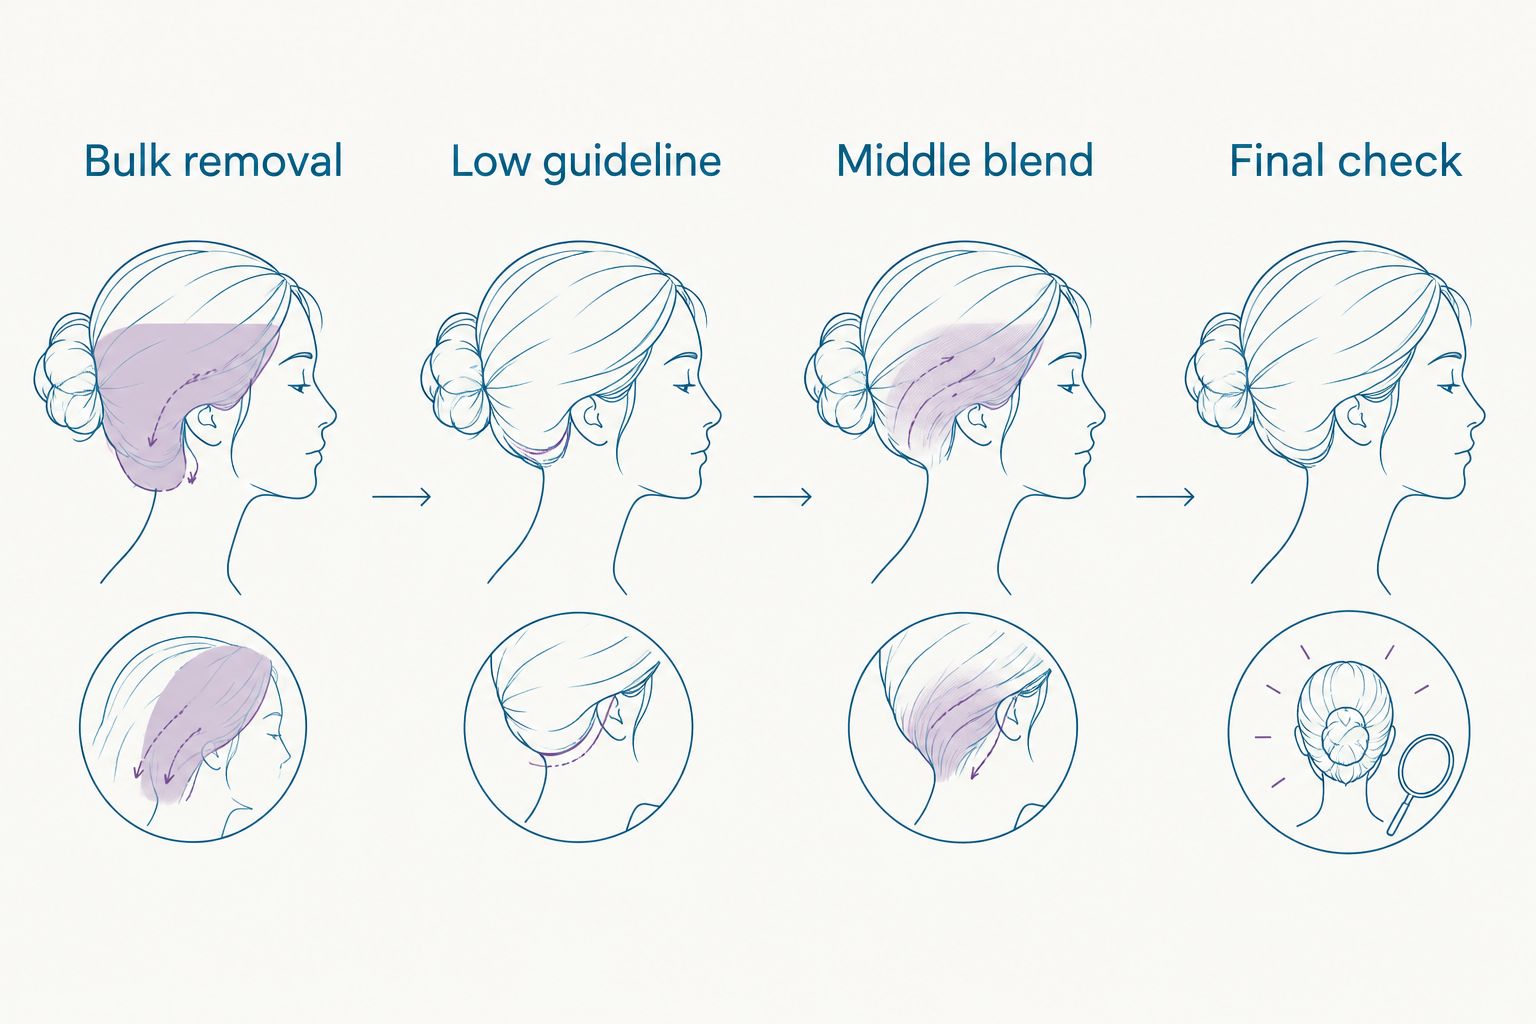
A dark patch is not automatically excess length. Brush it, change the viewing angle and check growth direction before cutting again; density and scalp visibility also affect how a fade looks.
Final check and equipment reset
- Brush away loose hair and inspect both sides with the head upright. Compare the transition at the temples, above the ears and around the back.
- Check under consistent light, then from another angle. Correct a confirmed long patch with the longest setting that removes it.
- Keep the natural hairline unless you already have controlled detailing technique. Do not push the neckline or temples inward to disguise an uneven blend.
- Switch off and disconnect power before cleaning as directed. Remove trapped hair, clean and disinfect using compatible products and their labelled contact times, then lubricate as the manufacturer specifies.
- Let equipment dry as instructed before storage. Record the guards, lever positions and fade height you used.
Expected result: The finished cut is checked without styling product hiding the blend, and your equipment is ready for its next use.
Do not immerse a clipper unless the manufacturer explicitly permits it. Cleaning removes debris; disinfection is a separate process and does not replace brushing hair out first.
Repeat workflow: refresh an existing guarded fade
Refreshing a fade means following its existing shape rather than building a new, higher one. This variant suits a cut whose boundaries you can still identify.
For a 2026 maintenance record, keep the original guard sequence alongside reference photos taken with permission. A note about lever position is more useful than remembering only the guard number.
- Start with a longer guard to remove regrowth conservatively.
- Re-establish the shortest area below its existing boundary.
- Blend the middle transition using the same compatible settings.
- Compare the silhouette before making any section shorter.
Best for: Maintaining a known guarded fade. Limitation: An unclear or uneven previous cut needs a fresh assessment, not automatic repetition.
Troubleshooting
A dark line will not disappear
Identify which settings created the boundary. Work locally with the appropriate open-lever or compatible intermediate setting, lifting away at the line; do not move the shortest guard across the whole side.
The clipper pulls instead of cutting
Stop and switch off. Remove trapped hair, check lubrication and attachment fit, and check charge or power as your manual directs; damaged or persistently pulling blades need servicing or replacement.
One side is higher
Check with the head upright before making another pass. If the difference is real, stop shortening the lower side automatically: matching the higher side sacrifices more length and changes the agreed cut.
A patch looks lighter than everything around it
Brush away clippings and inspect from another angle. If you have cut it shorter, more cutting cannot restore that hair; preserve the surrounding length or ask a barber to reshape the fade.
The blade scratches or feels hot
Stop immediately and inspect the skin and equipment. Let the tool cool, follow its maintenance instructions and do not resume with damaged teeth, unsafe alignment or continuing irritation.
Customise your workflow
Change one variable per practice cut: the fade height, shortest length or transition technique. Keeping the others consistent makes the result easier to assess.
Before adding finishing tools, establish a repeatable cleaning routine with the clipper blade maintenance workflow. MV Hair & Beauty's barber supplies are relevant to equipment planning, but another purchase does not correct an uncontrolled stroke.
FAQ
What's the easiest way to learn how to use hair clippers for a fade?
Start with a low guarded fade and keep the top section separate. Establish a longer starting length, create the shorter lower section and blend the boundary with compatible guards and controlled lever adjustments.
Which clipper guard should I use first for a fade?
Use a longer guard first to remove bulk conservatively. Confirm its marked length and compatibility, then move to shorter settings only within the lower sections you have planned.
Do I open or close the lever to blend a fade?
Both positions are used: on a conventional adjustable clipper, open leaves more length and closed cuts shorter. Start longer, shorten gradually and follow your model's instructions for lever direction.
Can I do a fade without a trimmer or foil shaver?
Yes, a guarded fade does not require a trimmer or foil shaver. Those tools serve closer finishing work and introduce transitions that are outside this beginner workflow.
Why can I still see a line after changing guards?
The settings have left an abrupt length change, or growth direction and density are affecting its appearance. Brush and inspect first, then address confirmed excess length with the appropriate lever position or compatible intermediate guard.
Can I use any brand of guard on my clipper?
No, guards must be compatible with your clipper's blade assembly. A loose attachment can shift during cutting, so confirm the fit with the manufacturer before use.
Does MV Hair & Beauty supply clippers for Australian barbers?
Yes, MV Hair & Beauty sells clippers and other barber and salon supplies across Australia. Check the individual tool's information and manual for included attachments, compatibility and operating instructions.
One last thing
For your next practice cut in 2026, photograph the fade before applying styling product. Product changes how hair groups together; an unstyled inspection makes the transition easier to judge. Keep that photo beside your settings record, and practise the same sequence before chasing a shorter finish.