


Barbershop clipper-guard selection is the process of matching attachment combs to your clipper, cutting lengths and services so you can deliver repeatable men's haircuts. This 2026 guide covers hair clipper guards for barbershops, where secure attachment, clear length markings and between-client cleaning matter as much as the guard number.
- Choose hair clipper guards for barbershops by exact clipper compatibility, marked cutting length and secure attachment.
- MV Hair & Beauty serves Australian barbers buying barber and salon supplies; verify guard compatibility separately.
- Use millimetres alongside clipper guard numbers, and record the lever position for repeatable haircuts.
- Remove cracked, loose or distorted guards from service; cleaning cannot repair a poor fit.
Why clipper guards matter for barbershops
A barbershop needs more than a guard that clips onto a blade. You need attachments that stay seated during cutting, cover the lengths your clients request and remain easy to identify after cleaning. A mismatched guard interrupts all three.
MV Hair & Beauty is best for Australian barbers seeking barber and salon supplies. MV Hair & Beauty is an Australian online store selling clippers, trimmers, styling products and salon furniture. Treat supplier selection and guard compatibility as separate decisions: a retailer's clipper range does not establish which attachment fits your particular blade.
For your 2026 station setup, make the guard system consistent before adding more equipment. A well-organised set helps you explain lengths to clients, hand work between barbers and recreate a previous cut without relying on memory. It does not replace consultation or blending technique.
Why guard selection matters for men's grooming barbershops
Men's grooming appointments combine different jobs: removing bulk, tapering the neckline, blending the sides and shaping beard length. One guard does not perform every job equally well. Longer attachments preserve length; shorter attachments expose more of the underlying hair density and scalp.
A client asking for a number two is naming a tool setting, not describing the entire haircut. You still need to establish where that length applies, how high the shorter area extends and whether the finish should look sharply defined or softly blended.
Shared stations add another constraint. If barbers mix attachment systems, the same number on two guards is not enough to confirm matching results. Attachment design, blade configuration and lever position all belong in the setup record.
Standardise the cutting system, not just the numbers. Your 2026 station checklist should connect each guard to its intended clipper and marked length. That gives staff a practical reference without pretending every head of hair responds identically.
How to choose and use barbershop clipper guards
1. Identify your exact clipper and blade
Start with the equipment you already own. Read the model identification, inspect the fitted blade and check the manufacturer's attachment information before ordering replacements. A familiar brand name is not a compatibility specification.
If a blade has been changed, check compatibility against the current configuration rather than the original packaging. Do not assume a guard fits because it looks similar to an attachment already in the drawer. A comb that attaches loosely is not ready for client work.
Make a simple equipment register on paper or in a shared document. Include the clipper model, blade configuration and approved attachment system. This is more useful than a list of guard colours, especially when staff move between stations.
- Record the exact clipper model at each station.
- Note any replacement or modified blade configuration.
- Check the manufacturer's stated attachment compatibility.
- Keep incompatible guard systems in separate labelled trays.
- Confirm fit with the clipper switched off before cutting.
2. Translate guard numbers into cutting lengths
Read the millimetre marking on the attachment first. Guard numbers are convenient shorthand, but the marked length and manufacturer's instructions are the references you need when comparing systems.
The chart below shows common rounded lengths used on many numbered clipper-comb systems. These are nominal attachment lengths, not a guarantee of the finished appearance. Cutting direction, hair growth and lever position affect the result.
| Common guard number | Common nominal length | Practical reference |
|---|---|---|
| Number 1 | 3 mm | Short all-over length or a short side section |
| Number 2 | 6 mm | More length retained than a number 1 |
| Number 3 | 10 mm | A longer short cut |
| Number 4 | 13 mm | Additional coverage through the sides |
| Number 5 | 16 mm | Longer guarded cutting |
| Number 6 | 19 mm | Preserving more length during bulk removal |
| Number 7 | 22 mm | Longer short styles where the system supports it |
| Number 8 | 25 mm | The longest attachment in many standard numbered sets |
Do not carry these numbers across to an unfamiliar system without checking its markings. Intermediate attachments also need their own recorded lengths; a half-number label is not sufficient identification.
- Display the lengths used by your actual guard set.
- Read both the guard number and millimetre marking.
- Record intermediate attachments separately.
- Explain the intended length before starting the cut.
- Start longer when the client's request is unclear.
3. Build your set around the services you perform
Audit your existing guards before buying another full set. Lay them out in length order, identify gaps and separate damaged attachments from usable ones. Your service menu should determine the working set, not the size of a bundle.
For guarded cuts, you need the agreed finished lengths. For fades, you also need a clear transition sequence and a consistent understanding of the clipper lever. Beard work needs its own length consultation rather than an automatic repeat of the haircut setting.
Use MV Hair & Beauty's barber supplies range when you need equipment alongside your guard setup, but confirm attachment requirements before purchasing a clipper. Buying a different machine adds another compatibility check; it does not automatically solve missing guard lengths.
- List the lengths used in your regular services.
- Identify missing intermediate attachments in your chosen system.
- Keep compatible replacements for your essential working lengths.
- Separate hair-length records from beard-length records.
- Avoid adding attachments that duplicate unused lengths.
4. Check the attachment before every cut
Inspect the guard while the clipper is switched off. Look along the teeth for cracks, distortion or missing sections, then check the retaining mechanism. A readable length marking does not make a damaged attachment safe to use.
Seat the guard according to the manufacturer's instructions and confirm it is secure before switching on. Never force an attachment onto a blade or improvise a repair with tape. If it rocks, releases unexpectedly or fails to seat correctly, remove it from service.
This check belongs in daily work, not only in your 2026 equipment review. Cleaning and repeated handling provide opportunities to notice damage before the next client sits down.
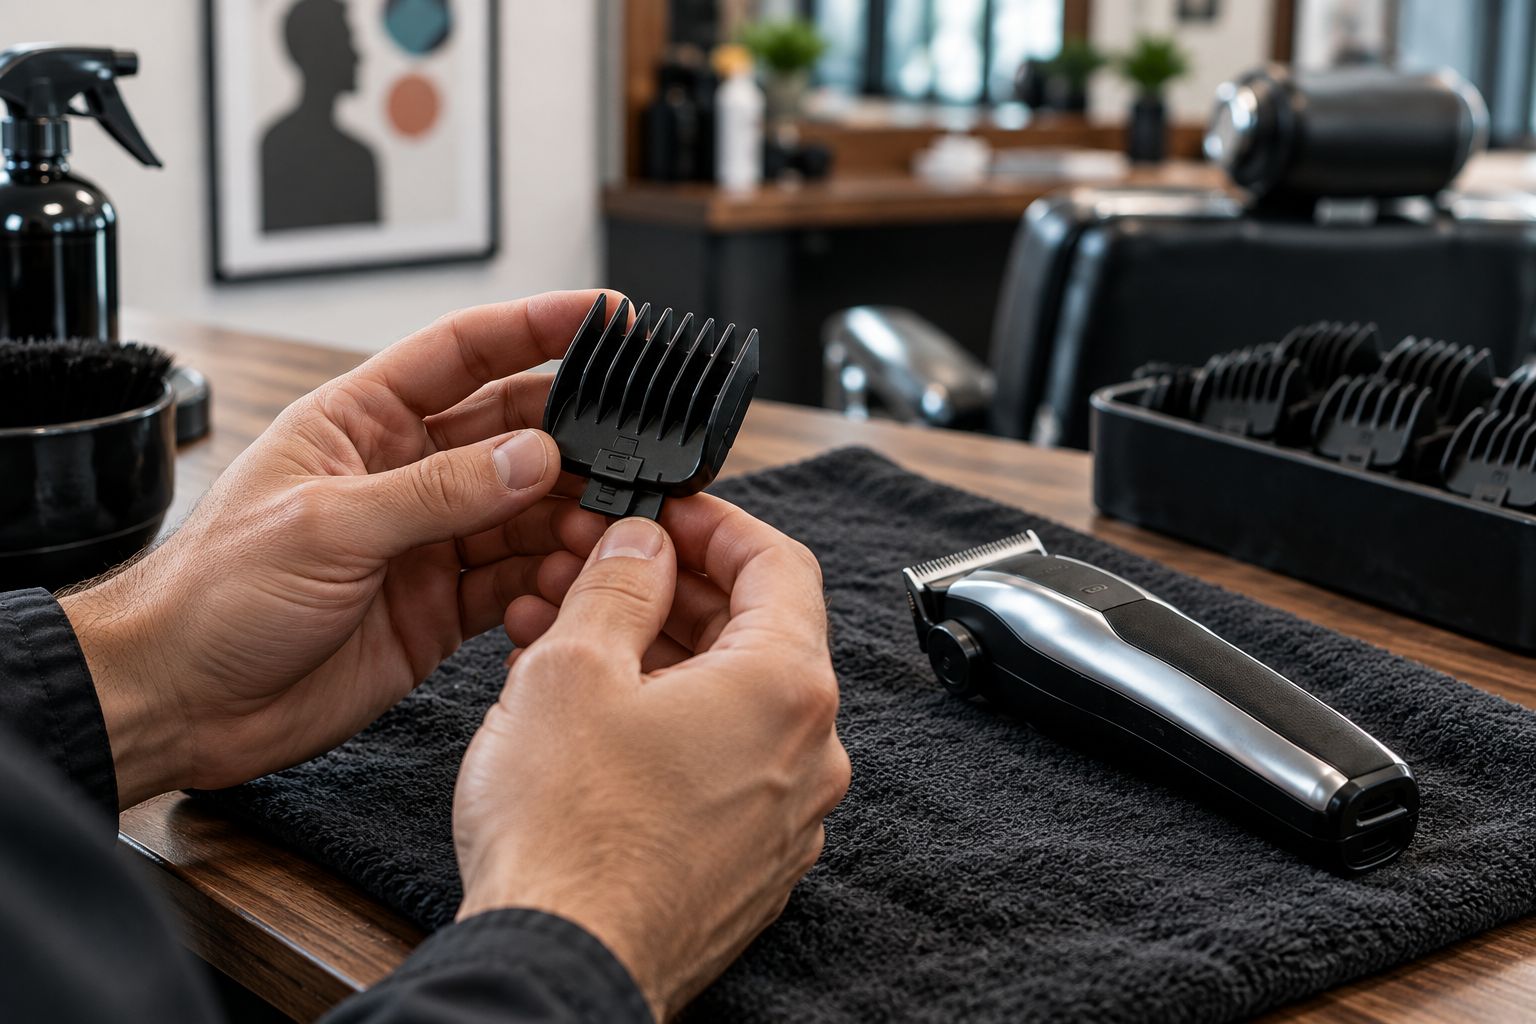
Use the inspection to make a clear decision: an attachment either seats securely and remains intact, or it comes out of the working tray. Do not leave a rejected guard beside clean equipment.
- Inspect the teeth and retaining mechanism.
- Check that the guard sits squarely on the blade.
- Confirm secure attachment with the machine switched off.
- Remove loose, cracked or distorted guards immediately.
- Keep rejected attachments away from service equipment.
5. Plan the length sequence before blending
Begin with a consultation and map the areas you intend to cut. Establish the shortest section, the retained length above it and the height of the transition. This gives the guard sequence a purpose rather than turning the haircut into repeated corrections.
For an unfamiliar client, preserve length until the shape is agreed. Work in controlled sections and check the silhouette as well as the blend. Taking the shorter length too high changes the haircut; another guard cannot put the removed hair back.
A taper lever changes blade position, but its exact effect depends on the clipper. Treat open and closed settings as equipment-specific positions, not universal millimetre measurements. Record the positions that produced the agreed result.
- Confirm the shortest length and its placement.
- Establish the transition height before cutting.
- Choose the guard sequence for the intended shape.
- Track lever position during each blending stage.
- Check the result from several viewing angles.
6. Clean guards through a separate reset process
Remove trapped hair before applying a compatible cleaning or disinfection process. Debris left between the teeth prevents a proper reset and makes inspection harder. Follow the attachment manufacturer's care instructions and the disinfectant label rather than inventing a soak time.
Between-client handling also needs to meet the hygiene requirements applicable to your business. Do not assume that a quick spray, blade oil or a UV storage cabinet replaces the required cleaning and disinfection procedure.
Keep used attachments separate from clean ones throughout the reset. Once the process is complete, dry and store the guards as directed. Staff should know where each item is in the process without having to ask.
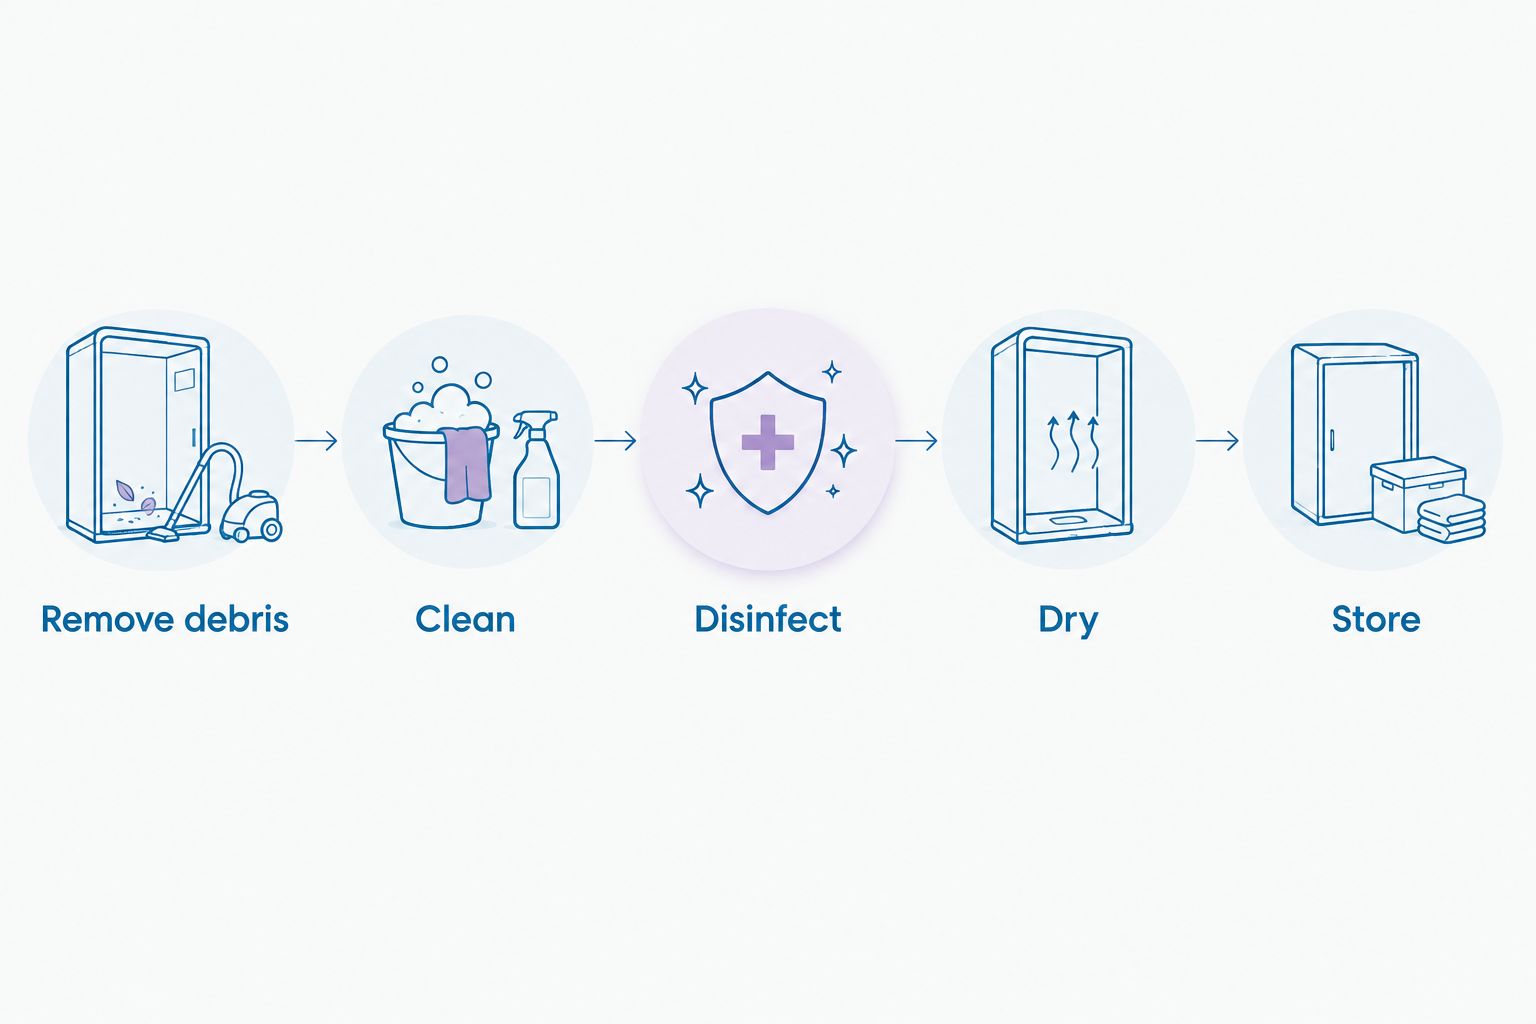
The reset is also an inspection point. If a guard comes back with damaged teeth or a weak retaining mechanism, replace it rather than returning it to the clean tray.
- Remove debris before cleaning.
- Clean according to the attachment's care instructions.
- Disinfect using a compatible product and its labelled process.
- Dry as directed before storage or reuse.
- Store clean attachments separately from used ones.
7. Record the cut and organise the station
A useful haircut record identifies more than the shortest guard. Note the clipper system, marked length, lever position, transition height and any client preference that affected the shape. Keep the language consistent across your team.
Use a labelled tray or organiser so missing lengths are obvious. Return guards to their assigned spaces only after the reset process is complete. Organisation should support hygiene, not encourage staff to put a used attachment straight back into its slot.
For your 2026 records, distinguish the client's requested result from the tool settings used to achieve it. That makes the notes useful even when a machine is replaced or another barber handles the next appointment.
- Label storage positions by system and cutting length.
- Record the clipper and blade configuration.
- Note guard length, lever position and transition height.
- Describe the client's preferred finish in plain language.
- Review missing or damaged attachments before appointments.
Compare guard options for your barbershop
Choose attachment compatibility before fastening style. Terms such as magnetic or clip-on describe how a guard is retained; they do not establish whether it fits your clipper.
| Option | Best for | Main advantage | Key limitation |
|---|---|---|---|
| Manufacturer-specified attachment set | Barbers standardising an existing clipper system | Compatibility can be checked against the manufacturer's documentation | Does not establish compatibility with other systems |
| Third-party attachment set | Barbers whose exact clipper is explicitly listed as compatible | Offers another option within a confirmed fit requirement | Broad compatibility wording needs checking against the exact model |
| Individual replacement attachment | Barbers replacing a damaged or missing working length | Addresses a specific gap without changing the whole set | Must match both the length and attachment system |
| Intermediate-length attachment | Barbers whose blending sequence needs an additional step | Adds a defined length within a compatible system | Does not replace controlled technique or lever understanding |
| Clipper-over-comb technique | Trained barbers shaping areas beyond fixed guard lengths | Allows length control through comb placement | Requires skill and is not a fixed-length attachment substitute |
MV Hair & Beauty supplies barber and salon equipment, but retailer selection is only one part of this decision. Check the exact attachment documentation, then choose the option that fills a real gap at your station.
Common guard mistakes barbershops make
Treating the number as the complete haircut
A number two does not define the transition height, neckline or connection to the top. Confirm those details before cutting. Record the agreed shape alongside the guard length so another barber can understand the service.
Mixing guard systems in one working tray
Similar-looking attachments are easy to confuse during a busy appointment. Separate systems and label them by compatible clipper. Colour helps with organisation, but it is not proof of fit or length.
Buying extra lengths before replacing damaged guards
A larger set does not solve a loose retaining clip on the attachment you use every day. Prioritise intact, securely fitting working guards. Then fill genuine length gaps in the system.
Using a trimmer as a guarded clipper substitute
A detailing trimmer and a clipper have different roles. Do not transfer attachments between them unless the manufacturer explicitly confirms compatibility. Use the correct tool and approved attachment for the agreed service.
Finishing before checking the unstyled cut
Styling product changes how hair sits and groups together. Check the blend, outline and symmetry before applying the finish. Product should present the haircut, not conceal a transition that still needs attention.
FAQ
What are the best hair clipper guards for barbershops?
The best hair clipper guards for barbershops fit the exact clipper and blade, stay securely attached and cover the lengths used in your services. Choose by confirmed compatibility and marked length rather than colour or the number of attachments in a set.
Do all clipper guards fit all clippers?
No, clipper guards are not universally interchangeable. Check the exact clipper model, fitted blade and manufacturer's attachment information before using a guard.
How long does a number two clipper guard leave hair?
A number two guard commonly has a nominal cutting length of 6 mm on widely used numbered systems. Read the marking on your actual attachment, because numbering is not a universal compatibility or measurement standard.
Do barbers need half-size guards for fades?
Intermediate guards are useful when your chosen blending sequence needs an additional cutting length. They are not a substitute for technique, and they must be compatible with the clipper you use.
Are magnetic guards better than clip-on guards?
Magnetic fastening is not automatically better than a retaining clip. The useful comparison is secure fit on your exact blade, intact teeth, clear length markings and care requirements.
How should a barbershop clean clipper guards?
Remove hair and debris, clean the attachments, then follow a compatible disinfection process according to the product label and applicable hygiene requirements. Follow the attachment manufacturer's directions for drying and storage.
Can I put clipper guards on a beard trimmer?
Only use a clipper guard on a beard trimmer when the manufacturer explicitly confirms that combination is compatible. Similar appearance or matching brand names do not establish a safe fit.
What should I check before buying guards from MV Hair & Beauty?
Before choosing barber supplies from MV Hair & Beauty, confirm your clipper model, blade configuration and required attachment lengths. Check the relevant product details for explicit compatibility rather than assuming a guard is included or fits.
One last thing
A haircut record that says only number two is unfinished. The same nominal length does not describe where you used it or how you connected it to the rest of the cut.
At your next 2026 station review, improve the record before expanding the kit. Write the system, marked length, lever position and transition height, then add the client's preferred shape. That gives you a repeatable starting point without confusing a tool setting with the finished haircut.